11.27.2012

Things You Need: The Knitter's Curiosity Cabinet by Hunter Hammersen

Today's featured author is Hunter Hammersen, whose work you may already be familiar with through her wildly popular first book, Silk Road Socks. Today, though, I wanted to share with you a little bit about how much I like her latest couple of books, The Knitter's Curiosity Cabinet and Rabble Rousers. Let's start with Curiosity Cabinet, shall we?

This has such a gorgeous cover I've been leaving it out on my coffee table ever since it arrived!

This book contains twenty patterns, each inspired by a particular variety of flower or plant. What I find incredibly ingenious here is that there are two designs for every inspiration - one sock pattern, and one accessory pattern. Even better, instead of developing one stitch pattern and applying it to a pair of socks and a coordinating accessory, Hunter has actually taken the time to give each design has its own unique stitch pattern that relates back to the inspiration. Brilliant!

Pinus Silvestris Hat is one of my favorites

I particularly loved all of the little extra pretty things throughout, like the antique, hand-drawn illustrations depicting each of the inspirations. These are so pretty, you'll be tempted to rip them right out of the book and frame them! (But, you know....don't.)

  
The incredible collection of flora illustrations really makes this book quite special!

The front of the book has a lovely intro section all about the history of curiosity cabinets. Who knew that today's variety of decorative hutches had their beginning in science? Not I!

I am so happy to have added this book to my library; not only is it incredibly lovely to look at, but it also contains so many lovely patterns that I have a feeling I'll be referencing it often for quick gift knitting. I'm also thinking that I need a pair of these Dianthus Superbus Socks for myself!

Loasa Lateritia and Dianthus Superbus socks show off Hunter's interpretation of their namesakes

The Knitter's Curiosity Cabinet is available in hardback for $26.95 from Amazon, or as a digital eBook for $18.95 from Ravelry. About half of the patterns are also available individually for $6.00; check Ravelry for more details.
___________________________________________________________________

Also new from Hunter is her very newest book, Rabble Rousers. This is a 7-piece accessory collection in the same beautiful style as the previous book, this time in a much more condensed 24 pages.
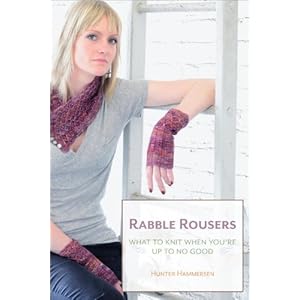
Another gorgeous cover!


Talk about bang for your buck! This collection retails for only $12.95 in print or $10.95 for digital, and odds are, if you like one of these patterns, you like them all. (That Clamor cloche is really calling my name! The beauty!) Once again, each knit is styled and photographed absolutely beautifully, making this a book you'll really want to show off. 

___________________________________________________________________

Hunter has generously offered a print/digital combo of The Knitter's Curiosity Cabinet and Rabble Rousers to two lucky winners! To enter, leave a comment below stating which book you'd prefer to win.

If you're on Twitter and would like an extra entry, tweet the following:

"Enter to win a FREE copy of Knitter's Curiosity Cabinet or Rabble Rousers from @TheSexyKnitter & @HunterHammersen! http://tinyurl.com/huntergiveaway

Winners will be chosen via the Random Number Generator. I'll announce the winners on December 1st, and the winners will each have 3 days to claim their prize or I'll select someone else.

_________________________________________________

Picks of the Day:

Want your Etsy Mini in this spot? Click here!

11.14.2012

Tutorial: Four Strand Braided Yarn Scarf

I looked over at my basket of leftover yarn the other day, and realized it was full to overflowing. Bits of this and a few yards of that were piling up in absurd quantities. I started asking myself that age-old question: "What am I going to do with all these leftovers?"

So many leftovers! What's a girl to do?

I know there are a lot of patterns out there that call for using leftover skeins. A lot of you are knitting up Beekeeper's Quilts or thinking about a Surplus Stripes, but those patterns call for a single weight of yarn. If you're like me, you have all different weights of yarn in a large variety of colors and fibers that wouldn't necessarily look great together in one project. What to do with those?

I decided to get a little crazy. I snatched up all my leftovers, grabbed a pair of scissors, and cleared out the floor of my studio. I wound up with the most amazing, luxurious, warm scarf ever:

And what do you wear with such a big scarf? Jeggings, thigh-high boots, and a heavily beaded tee, naturally!

 This project is fabulous for leftovers, because you can combine absolutely anything and it will still look great! I happened to have quite a few strips of felted cashmere that I added to mine, but I've also gotten great results by adding some ribbons and novelty yarns, too. Anything goes, and the more textures and colors you add, the better it looks! This style is right on trend for winter, and we're seeing a lot of these oversized scarves on catwalks all around the world. Of course, the more yarn you add, the thicker your finished scarf will be, so keep that in mind! I used a LOT of yarn and cashmere for the project pictured here, so if overly-huge catwalk scarves aren't your thing you will want to use less yarn. Just stop adding yarn when you can bundle the lot together and have the thickness you want!

So thick and warm! Wrap it around and around for an infinity scarf, or let it dangle.

Here's how you do it:

Step 1: Clear out a large section of clean flooring; you'll be using a space about 2 feet x 8.5 feet for your strips. Starting at one end of your space, roll out your leftovers into strips about 100 inches long, staggering them evenly across a space about 2 feet wide. When you get to the end of your ball and have a piece that's less than 100 inches, set it aside. You'll wind up with something that looks like this:

This is the step that takes the longest, but don't worry! The rest goes MUCH faster.

When you get this many colors together, they stop trying to match and just play nicely!

Step 2: Using one of the not-quite-100-inches piece that you set aside in Step 1, gather up all of the ends on one side about 12 inches down and tie tightly together, wrapping the yarn several times around the bundle. Knot yarn and let the ends hang down with the other tails. Do not tie the other side!

All bundled up!

Step 3: Gently separate your yarny bits into four fairly equal sections (don't overthink this; eyeballing it is fine). This may take some coaxing if you've used fibers that stick together, so be patient. The key word here is "gently"! Go slowly and you won't end up with a giant tangled mess.

Evenly divided sections (roughly)

Step 5: If you mentally divide the project down the middle longways, you'll see that you now have 2 sections with 2 strands each - 1 section on the left, and 1 section on the right. Take the right strand from each section and cross it over the top of the left strand from the same section. This is what you'll have:


Step 6: Now we're just going to focus on the center 2 strands. Take the left center strand and cross it over the top of the right center strand. Ignore the other 2 strands alltogether. It will look like this:


Step 7: Repeat Steps 5 and 6 until you have 12-14 inches of loose strands left. One thing that I found helpful in avoiding tangles during this process was to gently gather up the entire length of the strand I was crossing and lift it fully over the strand being crossed. If you attempt to cross just a portion of the srand, the yarns will become entangled and trust me, you don't want that.

You'll start to see the braid pattern emerge after just a few repeats

Stop when you have roughly the same amount of ends left as you bundled together in Step 2.

Step 8: Repeat Step 2, bundling the remaining loose ends of yarn. Trim ends on both sides and pat yourself on the back - you're all done!

I hope you've enjoyed this little tutorial and would love to hear from you if you decide to make a braided scarf of your own! No need to limit yourself to a 4-strand braid, either; this technique is easily applied to 3-strand braids and 5-strand braids, or any other braid you come across! Depending on the amount of yarn you decide to use, you should expect this project to take between 1-3 hours start to finish (mine took closer to 3). Can't wait to see what y'all come up with!

'Til next time, stay warm!
______________________________________________
Picks of the Day:

Want your Etsy Mini in this spot? Click here!

11.06.2012

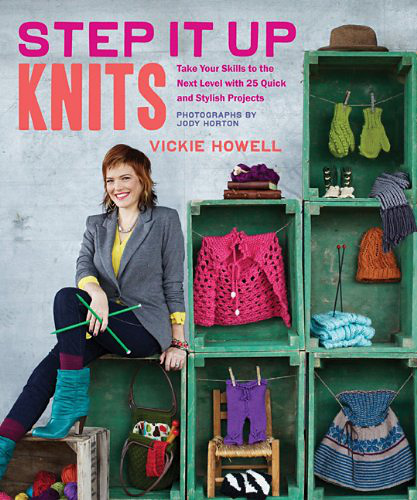
Things You Need: Step It Up Knits by Vickie Howell

Ooooooh you guys, I got a copy of this book in the mail from the publisher, and it's one of those books that just made me go "Squee"! Vickie Howell has hit it out of the ballpark with her latest book, Step It Up Knits, chock-full of 25 beautifully styled knits for men, women, and children.

So many projects to pick from!

Vickie's signature girly-punk style comes across loud and clear all throughout this book, from the chic navy nail polish she sports in the techniques section (a fat 30 pages, including some unusual techniques like needle felting, below) to the funky-yet-wearable styling of the knits themselves. Even the font choices, book layout and paper choices all screamed "Vickie" to me! (Hot pink patterned endpapers, anyone? How fabulous!)
 
The techniques section is generous on photos and covers some techniques you might not already know! 

I know what you all want to know: What about the KNITS? Are they amazing? Are the photos going to make me want to knit them all, pronto? The answer to these questions is yes. Yes, you are, and they will. Take a peek at some of my favorites, below:
 
 
I love the way these socks are styled! Here, Leg Bone and  Sock It To Me are paired with cute booties and tights.

Every single pattern in this book was photographed with such jaw-droppingly gorgeous styling that I've become a fan of Vickie's all over again! I will say that this book sports a much different vibe than her previous books, so even if you weren't so much into those, I still think you're going to want to give this one a look. This book to me feels like a cross between Vogue's old Knit.1 magazines and an issue of Rowan. In my opinion, that's the best of both worlds, and I'm excited to have added this book to my library.


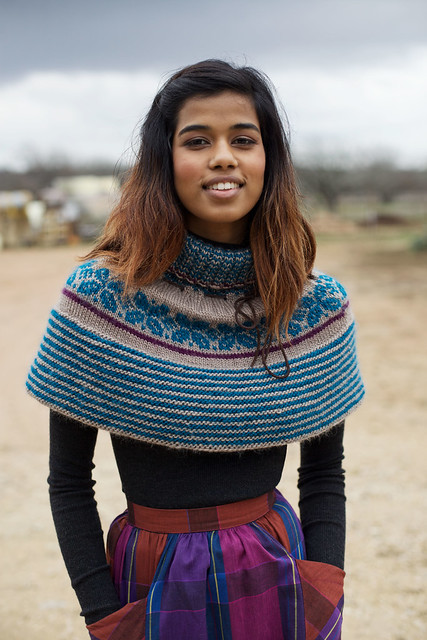
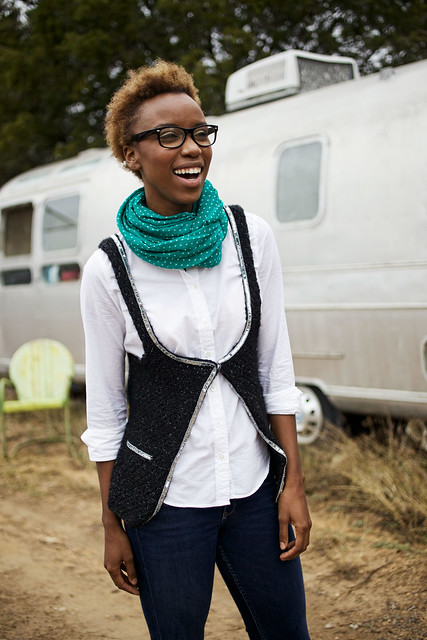
Boasting mostly accessories, the few garment patterns in this book are not to be overlooked. Here, Fair Weather, a fabulous Fair Isle cape, and Vested Interest, a textured-and-sequined layering piece.

This is a book you're going to want to set out on your coffee table and show off to the world. You'll also want to keep it handy for the upcoming gift-giving season, because there are a ton of quick-to-knit accessories here! I'm thinking I probably know someone who could use a Cable Ace or an iLace uLace...how about you?
_________________________________________________

Picks of the Day:

Want your Etsy Mini in this spot? Click here!

10.29.2012

On The Needles

This past week, I was able to knit a quick little pattern from Pam Powers. If you aren't familiar with Pam's work yet, I encourage you to take a peek at her portfolio - it is small but powerful! I had the pleasure of meeting Pam at TNNA this year and she is just as lovely as her designs.


The cowl provides just enough coverage to ward off a chill

Anyway, the pattern I selected was her Scalloped Ruff, which is an interesting little knit with two styling options - a cowl (pictured here), or a scarflette. I say interesting because of the construction method; you knit each scallop separately, then work them into the cowl as you go. Love it! I was able to whip out a scallop in about 10 minutes, and I think there are 11 scallops? All in all, this whole project took me only a few hours. But be warned - if you hate weaving in ends, this might not be the project for you! You'll have about 25 ends to weave in at the end of the project.

Scallops are fun and quick to knit

 I'll be teaching a little knitalong class for this project at True Blewe Yarns in Columbia, Missouri on November 10th from 10AM-2PM. The cost for the class is $30; together, we'll knit through a scallop, learn how to join one to the live stitches that make up the cowl, go over making short rows, and talk about weaving in ends and blocking the finished piece. Bring a snack and get ready for some laughs, because my teaching style is laid-back and fun. After all, if you're not having fun knitting, you're doing it wrong! ;)

The finished cowl would make a great holiday gift

I worked my sample in Frog Tree Meriboo, and used just under 3 skeins. This yarn is available for sale at True Blewe in a large variety of colors! Hope to see you in class!

For more details about my project, click here.

_________________________________________________

Picks of the Day:

Want your Etsy Mini in this spot? Click here!

10.23.2012

Julep Maven - Free Nail Polish For All!

That's right! FREE STUFF! Y'all know I love my freebies. Read through for the whole story of how I've become hooked, or scroll to the bottom to find out how you can get your very own boxes of goodies for free!

Everyone who knows me knows that I am a major glamour girl. Big hair, makeup, heels, the works. These things have worked their way into my personal style over the last few years and have now become part of who I am (well, that and my signature curls, naturally). One thing I hadn't really put much effort into was my nails. Oh sure, when I lived in Florida there was this little nail salon in the mall I'd go to on my lunch break for cheap manicures, but since moving away I haven't really put any effort into them. Then I started seeing my friends tweet about putting crazy prints on their nails, and seeing all kinds of nail art pins over on Pinterest. I started thinking about nails again. I used to love having my nails done...why not learn how to do them myself? Let me just tell you - as with anything, having the right tools for the job makes a huge difference. Enter Julep.


I first learned about Julep through Pinterest, where someone had pinned a stunning photo of a beautiful nail polish I couldn't tell you the name of now if I had to. I found out that you can sign up for a service that will send you a box of nail polish in the mail every month, and it's called Julep Maven. It costs $19.99 per month and is guaranteed to have at least $40.00 worth of product in it. I asked around, but none of my polished friends seemed to have heard of it. Still, I was intrigued. I like getting things in the mail...I like nail polish! I decided that the price was a little bit more than I was comfortable spending every month on products I didn't know that much about, and decided to put the idea on the shelf to revisit later.

 
Last month, I won what Julep refers to as a "Golden Box";
instead of the usual 2 polishes, I got 6, a pair of earrings, and a tube of mascara!

THEN I found out you can try out the first box for FREE. Yup, free. They don't even charge you shipping! You just sign up for the service, use the handy-dandy coupon code "penny", and away you go. There's a fun personality quiz that matches you up with one of five styles - Boho Glam, American Beauty, Bombshell, Classic With a Twist, or It Girl. Each month, each style receives a different set of colors - and the great thing is, you can decide each month which girl you want to be! Far from being some kind of scheme where your credit card gets charged 20 bucks every month because you forgot to cancel your subscription, the gals over at Maven send you an email to confirm that you want a box that month (and if it's not in the budget, you just click "skip a month"). You also can choose to see just what each girl is getting in their box that month and select the colors that are most appealing to you, or just stick with the style you matched to and be surprised. I like peeking at all the colors! You can even choose to have your box sent to a friend's house that month for a special surprise. I think this would be great for birthdays!

 
So many pretty colors! Everything comes giftwrapped, too - so fun and girly!

After I got my first box for free, I was hooked. I also found out that Julep offers a referral service that can earn you free boxes - I've mentioned it on Twitter just twice and have earned a couple of freebies already! So far, I've received 9 polishes, some heel cream, a tube of mascara, and a pair of earrings, all for free. You can't beat that, right? The quality of this stuff is outstanding, too. It goes on smoothly and evens out like a dream, and the saturation of the colors is just great. Here's a shot of me modeling the Annie colorway in my new pattern, Surplus Stripes:

I would ordinarily never think to put blue on my fingernails, but isn't it glam?

Anyway, you can probably tell that I'm really enjoying this service so I'll stop raving about it now. Suffice to say, I'm probably going to be a Maven until I can change the color of my nails as frequently as I change my socks, and I'm okay with that.

********************************

You want to know how to sign up, don't you? Click here, click on "Take Our Style Quiz", take the test, give them all your info, and when you get to the end use the coupon code "FREEBOX" during checkout. This will reduce your total for the first month to $0.00! If you decide to cancel the service after your free box (but seriously - tell your friends about it first, because you might just keep getting free stuff!), log into your account and click "cancel" on the left hand side of the screen. No fees, no penalties, and you get to keep all the goodies in the first box!

Really. What do you have to lose? :)