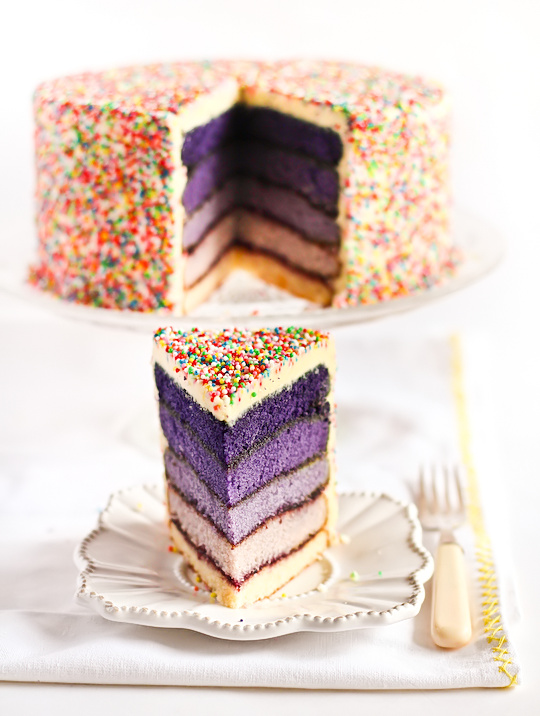
Sprinkle cake, a la Raspberri Cupcakes
This is usually the time of year when folks start thinking about losing weight, eating better, and generally being more healthy in the new year than they were in the last. While the rest of the world is daydreaming about finally getting those abs flat, I'm hung up on trying to get my cake layers flat. I mean, layered cakes are a big enough hassle without having to wrestle 1/4-inch off the top of each cake with an abnormally long serrated knife, amiright? I mean, someone could lose a finger, and that would not be a great way to start the new year. (As a side note, if you are looking to cut calories, check out this post for a tasty way to prepare boxed cake mix in a calorie-friendly way!)
I made a sprinkle cake on Saturday. The Dr. had been craving wedding cake for a week, and we were hosting our preacher and his wife for dessert so I figured, why not? I would've loved to do an ombre cake like Steph's, but the Dr. can be picky about details and I didn't think purple wedding cake would go over well. Word to the wise, though: covering a cake with sprinkles is WAY HARDER THAN IT LOOKS. I think I'll be finding sprinkles in the nooks and crannies of my kitchen until the day we move. I have absolutely no suggestions on how to prevent them from going everywhere, either; Steph suggests putting your cake into a giant container of some sort, but I was frosting on a cake pedestal so that was a no-go for me. I can only say if you're going to try this at home, have the vacuum handy.
Anyway, on with the point. I figured out an easy, no-muss, no-fuss, no-cutting, no-waste way of getting those cake layers perfectly flat, every time. And here's how I did it:


Step 2: Cover warm cake with a flexible silicon cutting mat.

Step 3: Put a large, flat cookie pan on top of the cutting mat.

Step 4: Plop a 2-pound bag of sugar (or other light weight) on top of the whole stack.

Step 5: When cool, remove all items from the top of the cake. Note that the just the very moist top coat of cake is going to stick to your silicon mat; this is your delicious, taste-testing treat! Scrape that goodness off with a fork and eat it. (Hey, you gotta make sure your cake is guest-worthy without cutting into it somehow, right?)

Voila! Perfectly flat cake layers with no cutting, no fuss, and no waste.

I didn't add any additional steps to this process - promise! No cutting, no weird frosting-some-parts-more-than-others, nada. Just stacked 'em right up and slapped some frosting on! And look how pretty and even it came out!
I think this technique could also work with sheet cakes; instead of a silicon mat, you'd want to use parchment paper, and instead of a cookie sheet and weight, use a light book or two.
....Yeah, I'm totally doing this any time I make cake layers from now on. WIN.
....Yeah, I'm totally doing this any time I make cake layers from now on. WIN.